
Silver nail polish is more than a seasonal sparkle; it’s a versatile neutral with a modern edge. This definitive guide cuts through the hype to show you how to choose, apply, and rock every shade from chrome silver nail polish to subtle matte silver for a flawless, long-lasting manicure. By the end of this guide, you’ll know exactly which silver nail polish finish suits you, how to apply it flawlessly, and how to make it last.
Whether you’re looking for a futuristic mirror finish or a delicate shimmer, mastering this metallic shade requires a bit of know-how. Silver isn’t just for the holidays anymore; it has cemented its place as a year-round staple that communicates sophistication and cool confidence. Let’s explore how to make this high-impact hue work for you.
Why Silver? The Science & Psychology of the Shade
While silver often spikes in popularity during festival seasons and winter holidays, its appeal goes deeper than just trend cycles. Understanding the why behind silver’s aesthetic success can help you wear it with more intention.
The Optical Advantage
From a scientific perspective, silver polishes particularly metallics and chromes, acting as light reflectors. Unlike crème finishes that absorb some light, metallic particles bounce light back, which can create an optical illusion of smoothness. This is why a good metallic silver can actually make the nail plate appear more uniform, masking minor ridges or imperfections if applied correctly. However, this reflective quality is a double-edged sword; it highlights precision, meaning a messy cuticle line is more visible with silver than with a soft pink.
The Psychology of Modernity
Psychologically, silver is associated with innovation, modernity, and a cool, detached elegance. While gold is often linked to tradition and warmth, silver feels forward-thinking. Wearing a sleek silver manicure signals a sense of refined edge, a cool girl aesthetic that feels effortless yet curated. It’s a powerful color that doesn’t need to shout to be heard.
The Silver Spectrum: Decoding Finishes & Undertones
Not all silver polishes are created equal. The difference between a frosted 90s silver and a modern liquid metal look lies entirely in the finish.
Understanding Finishes
To help you navigate the aisle, here is a breakdown of the most common silver finishes and what they deliver.
| Finish | Description | Best For |
| Chrome | A mirror-like, highly reflective finish that looks like liquid metal. Often achieved with powder or specialized gel. | High-impact statements and photography. |
| Metallic | A smooth, shiny finish containing fine metal-like particles. Less reflective than chrome but shinier than shimmer. | Everyday wear that feels polished and professional. |
| Shimmer/Pearl | A sheer or semi-sheer base with fine glitter dust. Offers a soft, glowing effect rather than a hard shine. | Subtle, romantic looks or layering over other colors. |
| Holographic | Contains pigments that refract light, creating a rainbow prism effect within the silver base. | Fun, festival vibes and sunny days. |
| Glitter | Clear base suspended with larger chunks of silver foil or plastic. | Accent nails or textured party looks. |
| Matte Silver | A flat, non-reflective gray-silver. Often looks like brushed aluminum or concrete. | Architectural, minimalist designs. |
Finding Your Undertone Match
A common misconception is that silver is strictly for cool skin tones. While silver naturally leans cool, the spectrum is wide enough for everyone.
- Cool Undertones: If your veins appear blue, look for true icy silvers or those with a blueish tint. These will harmonize with your skin rather than clash.
- Warm Undertones: If you have golden or olive skin, look for champagne silvers or pewters. These shades have a slight brownish or golden drop mixed in, preventing the polish from looking stark or washing you out.
- Deep Skin Tones: High-contrast, bright chromes look stunning against deep skin tones, creating a jewelry-like effect.
The Curated Edit: How to Choose Your Perfect Silver Polish
With thousands of options on the market, selecting the right bottle can be overwhelming. We have categorized the top contenders based on performance and formula.


Best Drugstore Metallic
Look for: Essie No Place Like Chrome
Why We Chose It: This is widely considered the gold standard (pun intended) for accessible metallics. The formula is opaque in one to two coats, and the brush is wide enough to cover the nail quickly, minimizing the risk of streaking, a common issue with budget metallics.
Best Salon-Grade Gel
Look for: OPI GelColor Go Big or Go Chrome
Why We Chose It: If you are searching for silver gel polish that won’t budge for two weeks, this is the industry favorite. It cures to a hard, glossy finish that resists dulling, maintaining that wet look longer than standard lacquer.
Best for Beginners (Forgiving Formula)
Look for: Zoya Trixie
Why We Chose It: Trixie isn’t a flat metallic; it has a slight sparkle texture. This visual texture is incredibly forgiving for beginners because it hides brush strokes. If your hand isn’t steady yet, a textured silver like this is your best friend.
Best Chrome Effect (Non-Gel)
Look for: ILNP Mega (X)
Why We Chose It: ILNP is famous for its boutique formulas. This holographic ultra-chrome offers intense light reflection without needing a UV lamp. It dries fast and offers a depth that flat polishes usually can’t achieve.


Pro Application: A Step-by-Step Guide for a Flawless Finish
Silver polish is notoriously unforgiving when it comes to texture. Ridges, bumps, and brush strokes show up instantly. Here is how to get a glass-like finish.
1. Prep is Non-Negotiable
Because silver reflects light, it highlights ridges. Use a ridge-filling base coat rather than a clear one. This acts like a primer for your walls, smoothing out the nail plate so the silver sits on top like a sheet of glass. Tip: Avoid skipping the powerful base coat with silver, as dark gray pigments can sometimes stain the natural nail yellow.
2. The Floating Technique
To avoid the dreaded brush strokes common with metallic silver nail polish, use the floating method. Load your brush with enough product so that the bristles barely touch the nail; instead, you are guiding the bead of polish over the surface. The less the bristles drag on the nail, the smoother the metallic finish will be.
3. Thin, Directional Strokes
Apply thin coats. Thick globs of silver polish will bubble. Paint in three distinct strokes: down the center, then one down each side. Do not go back over wet polish to fix it this will drag the metallic particles and create streaks. Let it dry, then fix it with the second coat.
4. Chrome at Home
If you are using a chrome powder (the best way to get that mirror effect), apply it over a no-wipe gel top coat that has been cured for only half the recommended time. The surface needs to be slightly tacky for the powder to stick, but hard enough not to dent. Buff the powder in with a silicone tool or eyeshadow sponge until you see your reflection.
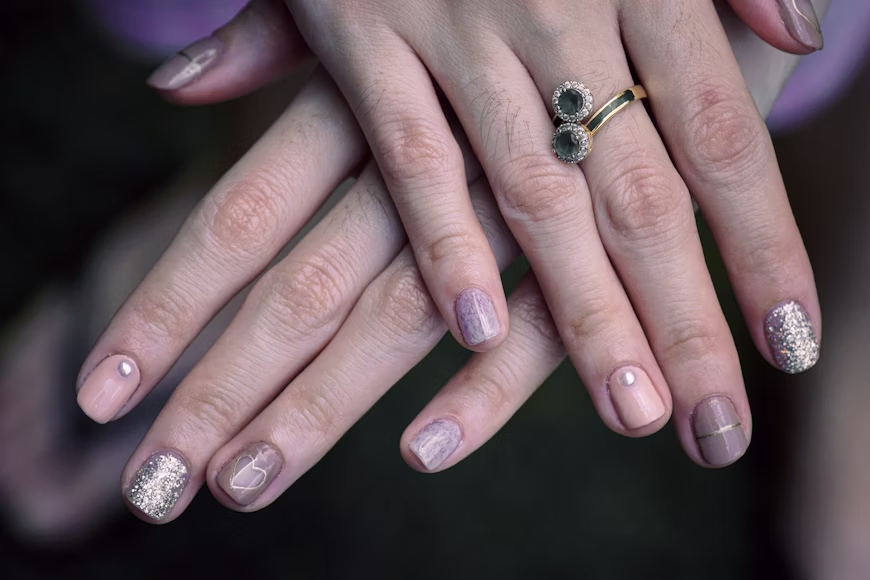
The Silver Manicure Manual: Design Ideas for Every Skill Level
Once you have the basics down, you can start experimenting with nail art. Silver is a fantastic medium for design because it acts as a neutral that catches the eye.
Beginner: The Micro-French
Ditch the classic white tip for a metallic edge. Paint your nail a sheer nude or pink, and use a fine liner brush to paint a razor-thin silver line across the free edge. It’s subtle, office-appropriate, and incredibly chic.
Intermediate: Abstract Metals
Tap into the negative space trend. Use a thin brush to draw organic, melting shapes or geometric lines in silver over a bare nail. The contrast between the natural matte nail and the liquid-looking silver creates a high-fashion architectural look.
Advanced: Chrome Ombré
This requires a sponge and patience. Apply a neutral base, then sponge silver polish (or pat chrome powder) starting heavily at the tip and fading toward the cuticle. The result is a gradient that looks like your nails have been dipped in mercury.
Longevity & Removal: How to Protect Your Mani
The sparkle of silver can fade quickly if not protected, and removing it can be a headache if it contains glitter.
Locking in the Shine
Metallics tend to dull after a few days as the surface gets scratched. To prevent this, use a glossy, plumping top coat. Reapply a thin layer of top coat every 3 days to maintain the wet look. Avoid matte top coats on metallics unless you are specifically aiming for the brushed steel” effect, as it kills the dimension.
The Foil Method for Removal
If you opted for a glitter-heavy silver, do not scrub your nails with a cotton ball, you will shred the cotton and damage your nail bed.
- Soak a cotton pad in acetone-based remover.
- Place it on the nail.
- Wrap the fingertip tightly in aluminum foil.
- Wait 5–10 minutes.
- Slide the foil off; the polish should slide off with it.
Make Silver Your Signature
Silver nail polish is a powerhouse in any beauty arsenal. It bridges the gap between the flashy glamour of gold and the cool utility of gray. By choosing the right finish for your skin tone and mastering the application, you elevate your manicure from a simple beauty routine to a style statement.
Whether you are heading to a local salon or browsing the aisles of a beauty supply store for that perfect bottle of silver nail polish near me, remember that confidence is the best top coat.
Ready to try the look? Check out our latest video tutorial on Instagram where we demonstrate the floating brush technique for a streak-free metallic finish!
Sources
- Cosmopolitan. (2023). The Best Silver Nail Polishes
- Byrdie. (2024). How to Remove Glitter Nail Polish
- Allure. (2023). Chrome Nails Trend Guide