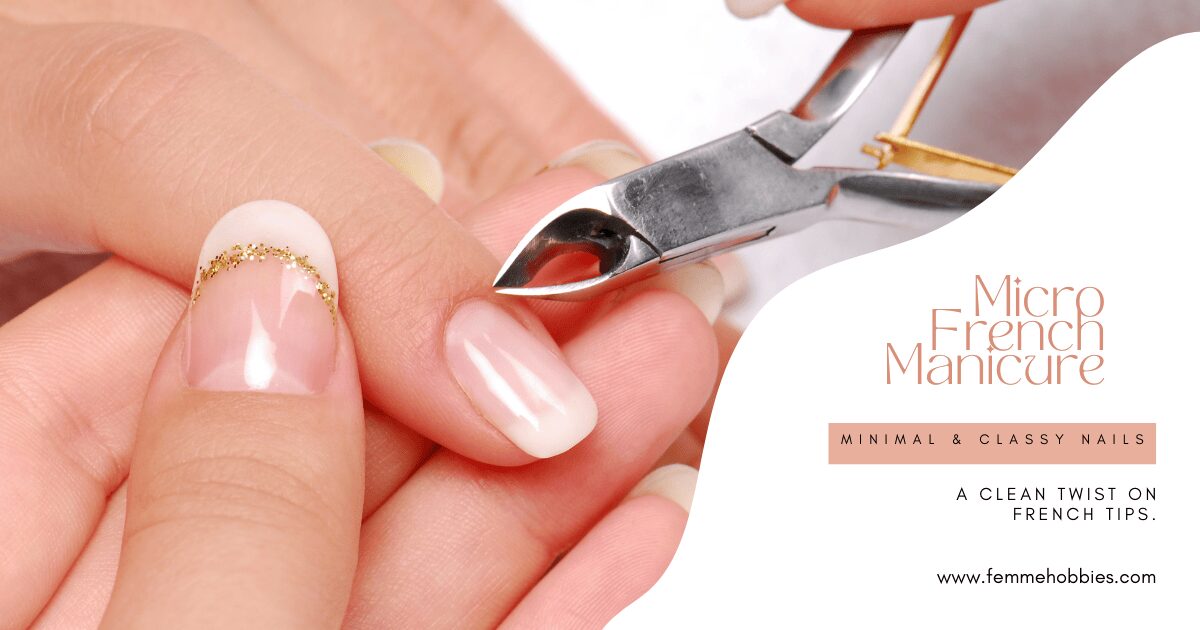
Forget everything you think you know about the French manicure. The micro French manicure is the modern, minimalist update that works for every nail length, especially short and almond nails. This isn’t your mother’s French tip; it’s a subtle art form defined by a hair-thin line that offers maximum style with minimal fuss.
I first stumbled upon the micro French manicure a few years ago while scrolling through my feed, and it was an instant aha moment. For years, I’d associated French tips with a thicker, more pronounced look that never felt quite right on my shorter nails. But this delicate, barely-there line was different. It was chic, modern, and incredibly flattering. As someone who has spent the last four years rigorously testing and reviewing everything from coffee makers to beauty trends, I knew I had to explore this one deeply. I was determined to find out if it was as universally wearable as it seemed and to master the technique for achieving it at home.
So, what exactly is a micro French manicure? According to cosmetologists at the Ogle School, it’s defined by its ultra-thin line along the tip of the nail. Unlike the classic version, this whisper-thin line creates the illusion of a longer nail bed, making it an ideal choice for those with shorter nails or anyone seeking a more refined look. This subtle detail is what makes the trend so versatile, looking just as stunning on short, square nails as it does on elegant, almond-shaped micro French manicure nails.
This guide contains affiliate links. If you purchase through our links, we may earn a commission at no extra cost to you. We only recommend products we’ve tested and believe in.
How to Get a Flawless Micro French Manicure
Whether you’re heading to the salon or trying it yourself, achieving that perfect, crisp line is key.
At the Salon: What to Ask For
To ensure you get the look you want, you need to be more specific than just asking for a thin French. Here’s how to communicate with your nail technician for perfect results:
- Ask for an ultra-fine smile line or a micro French tip.
- Specify that you want the line to be just 1-2mm thick.
- Request they use a fine-detail liner brush for maximum precision.
- Please specify your preferred nail shape, such as almond, round, or square.
- If you have longer nails, ask for a milky nude or sheer pink base to help hide your natural smile line and create a seamless canvas.
At-Home Masterclass: Your DIY Tutorial
Ready to become your own nail artist? With the right tools and a little practice, you can master the micro French manicure at home. In our testing, we found these tools and techniques yielded the most professional-looking results.
Essential Tools You’ll Need:
- Nail Prep: Nail file, buffer, and cuticle pusher.
- Base Coat: A quality base coat is non-negotiable for longevity. (We recommend Orly Bonder Base Coat).
- Base Color: A sheer pink or milky nude polish. (Essie’s Ballet Slippers is a classic for a reason.)
- Tip Polish: A highly pigmented white, black, or colored polish.
- Liner Brush: A high-quality, size 1 liner brush is your most important tool. (In our testing, the Beetles Nail Art Liner Brush Set provided the best control.)
- Top Coat: A glossy, quick-dry top coat to seal your design. (Seche Vite Dry Fast Top Coat is a cult favorite.)
- For the Gel Method: A sticky base coat, gel polishes, an LED lamp, and a non-wipe gel top coat. (The Beetles Gel Polish Starter Kit has everything you need.)
Step-by-Step for Regular Polish (The Stamping Hack)
This viral hack is fantastic for beginners who struggle with a freehand line.
- Prep Your Nails: Shape, buff, and clean your nails. Apply one layer of your base coat and let it dry completely.
- Apply Your Base Color: Apply one or two coats of your sheer base color. Let it dry thoroughly—this is crucial for a clean stamp.
- The Stamp: Apply a small amount of your tip polish onto a silicone nail stamper.
- Create the Line: Gently press the tip of your nail into the polish on the stamper at a 45-degree angle. Rock it slightly from side to side to create a thin, even line. The amount of pressure you apply controls the line’s thickness, so practice a few times.
- Clean Up & Seal: Use a small brush dipped in acetone to clean up any mistakes. Once dry, apply a generous layer of top coat to protect your design.
Step-by-Step for Gel Polish
For a longer-lasting manicure, the gel method is the way to go.
- Prep is Key: Prep your nails as usual, paying close attention to pushing back cuticles and lightly buffing the nail surface to remove shine. Wipe with an alcohol pad.
- Apply Gel Base: Apply a thin layer of gel base coat and cure under your LED lamp for 60 seconds.
- Add Base Color: Apply one or two thin coats of your sheer nude or pink gel polish, curing for 60 seconds after each coat.
- Draw the Line: Put a small drop of your white or colored gel polish onto a palette. Dip your liner brush in and carefully draw a thin line across the tip of your nail. Take your time—the great thing about gel is that it won’t dry until you cure it.
- Cure the Tip: Once you’re happy with your line, cure for 60 seconds.
- Top It Off: Apply a non-wipe gel top coat over the entire nail and cure for a final 60-90 seconds for a high-gloss, durable finish.
Micro French Manicure Inspiration
The micro French is a perfect canvas for creativity. Here are some ideas to get you started, organized by theme.
The Classics
This timeless look is perfect for any occasion. A crisp white or bold black tip on a nude base is the epitome of understated elegance.
- Get the Look: For a flawless white tip, use an opaque polish like OPI’s Alpine Snow. Pair it with a your nails but better sheer pink like Essie’s Mademoiselle. For a dramatic twist, try a jet-black tip with OPI’s Black Onyx.
A Pop of Color
Inject some personality into your manicure with a vibrant tip. This is a great way to play with trends without committing to a full-color nail.
- Get the Look: Experiment with a bright pink, cobalt blue, or lemon yellow. A set of highly-pigmented polishes like the ILNP Summer Collection offers a range of trendy shades perfect for this style.
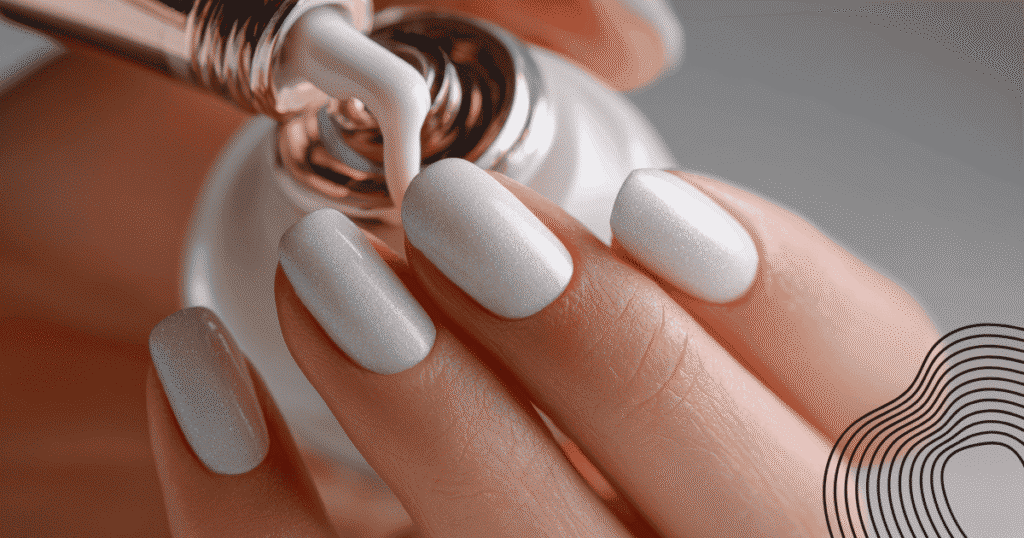
Elevated Effects
Add a touch of glamour with metallic or glittery tips. This look is perfect for holidays, events, or anytime you want your nails to feel a little extra special.
- Get the Look: A fine line of gold or silver creates a jewelry-like effect. For a true metallic finish, use a chrome powder kit over a no-wipe gel top coat. For a simpler sparkle, a glitter liner or a glitter topper like Sally Hansen’s Disco Ball works beautifully.
For the Bold
Why stick to one color? A rainbow or multi-colored micro French is a playful and eye-catching way to express your style.
- Get the Look: Assign a different color to each nail for a fun, skittles-inspired look. A mini polish set with a variety of colors is perfect for creating this design without having to buy multiple full-sized bottles.
Making Your Manicure Last
You’ve perfected your micro French; now it’s time to protect it. Follow these aftercare tips to keep your nails looking pristine:
- Apply a top coat every 2-3 days to prevent chipping and maintain shine (for regular polish).
- Wear gloves when doing dishes or cleaning to protect your nails from harsh chemicals.
- Apply cuticle oil daily to keep your nails and surrounding skin hydrated.
- Be gentle with your nails. Avoid using them as tools to open cans or scrape things.
Regarding longevity, a gel micro French manicure can last two to three weeks, while regular polish will typically last five to seven days with proper care. Its subtlety makes it incredibly office-appropriate, and as we’ve covered, it is absolutely ideal for short nails.
A Modern Staple for Every Style
The micro French manicure is more than just a fleeting trend; it’s a modern classic. Its versatility, elegance, and suitability for all nail lengths and shapes have cemented its place as a go-to style for minimalists and maximalists alike. Whether you opt for a classic white tip or a playful rainbow design, this subtle look makes a powerful statement.
Ready to try it for yourself? Tag us in your micro French manicure photos on Instagram or pin your favorite design for your next salon visit!
Your Top Questions About the Micro French Manicure
The defining difference is the line thickness. A micro French uses a hair-thin line (1-2mm), while a classic French tip is significantly wider (3mm+). The micro version is more subtle and modern.
Yes, it’s ideal! The thin line creates the visual illusion of a longer nail bed, making short nails appear more elegant and elongated.
Be specific! You can say: “I’d like a micro French manicure on an almond shape with an ultra-thin white tip, please use a detail brush for precision.” Showing your nail tech a picture is always best.